Afternoon Tea Chez W

This weekend saw me making an afternoon tea for some of the girls. My mission was to make everything myself (and this was accomplished 😀 ). I’ll admit, I did save some of my baking from last month and kept them in the freezer ready to defrost on Sunday morning but they still tasted just as good as the first time.

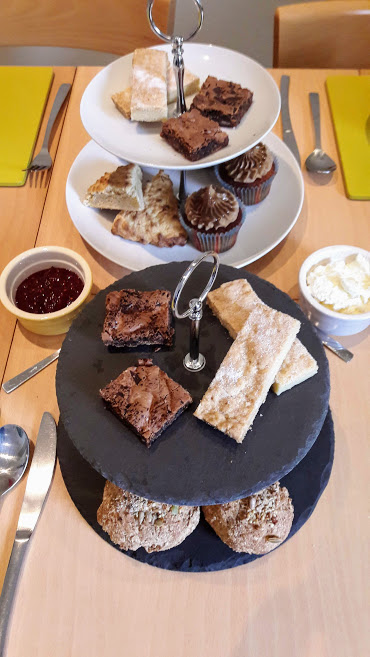
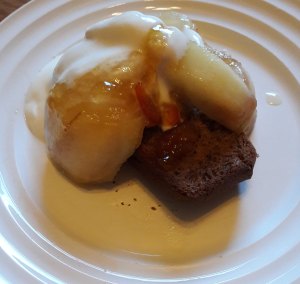
The girls were in for a treat with homemade parsnip ginger soup) soup topped with some crunchy chickpeas (recipe courtesy of Tesco Food)  and served with some freshly baked soda bread rolls (recipe to follow). Next up were gin and lemon scones (improvements needed to recipe as dough was too wet and didn’t rise. Still tasted good with some freshly whipped cream and raspberry conserve) and classic shortbread finger biscuit (recipe to follow). Finally we had some chocolate orange brownies (for the chocolate fix) and caramel appletini cupcakes (recipes to follow).

It was fun planning the menu and trying out some new bakes. Glad that it went down so well.


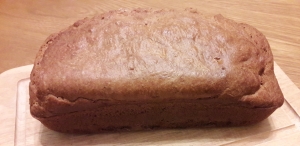
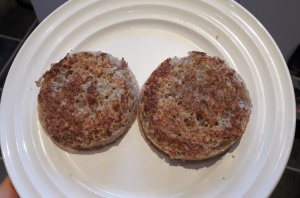
Soda Bread Rolls (taken from Healthy Food Guide)

  • 350g wholemeal flour
  • 1tsp bicarbonate soda
  • 1tsp ground cinnamon
  • 1tsp ground ginger
  • 1tbsp dark brown soft sugar
  • 284ml carton buttermilk
  • toasted mixed seeds
  1. Heat oven to 160C fan and line a baking sheet with baking paper. In a large bowl, mix together the first five ingredients. Stir in the buttermilk with 2tbsp water.
  2. Bring together with your hands and knead very lightly (add a little more flour if getting too sticky). Divide the dough into eight equal sized pieces and roll into a ball. Place on the baking tray, brush with some water and sprinkle over the toasted mixed seeds, lightly pressing in place. Bake for 20-25 mins.
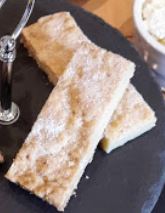
Shortbread Fingers

  • 115g unsalted butter, room temperature
  • 55g caster sugar, plus extra for dusting
  • 175g plain flour
  1. Heat oven to 150C fan and line a 20cm square baking tin with baking paper.
  2. Cut the butter into squares and put in a mixing bowl along with the sugar and flour. Rub the butter into the flour and sugar before bringing together to form a dough. Press the dough into the prepared tin and prick with a fork.
  3. Lightly mark into ten fingers before baking for about 35-40 mins. The shortbread will have started to colour slightly.
  4. Cut properly into fingers whilst still hot and dust slightly with caster sugar. Leave to cool in the tin for around 30 mins before removing.

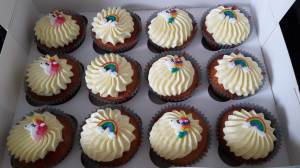
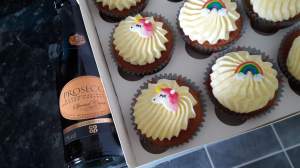
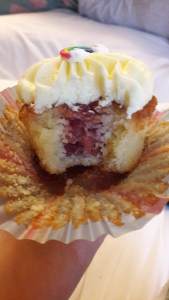
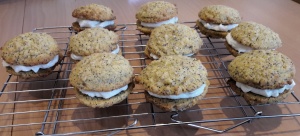
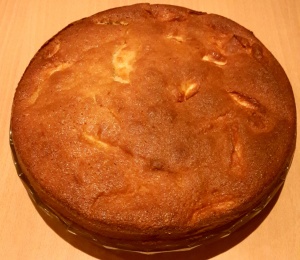
Caramel Appletini Cupcakes

  • 190g plain flour
  • 1 1/2tsp baking powder
  • 1tsp ground ginger
  • 1tsp ground cinnamon
  • 1/8tsp ground nutmeg
  • 1/4tsp salt
  • 115g baking margarine
  • 200g caster sugar
  • 1tsp vanilla extract
  • 2 eggs
  • 4tbsp apple sauce
  • 2tbsp apple juice
  • 2tbsp salted caramel vodka
  1. Heat oven to 180C fan and line a 12 hole cupcake tine with paper cases.
  2. Sift together the flour, baking powder, spices and salt in a bowl. In a separate bowl beat together the baking margarine and caster sugar until pale and fluffy. Add the vanilla extract, then add the eggs one at a time, beating well after each addition. Add half of the flour mixture and the apple sauce, apple juice and salted caramel vodka and beat together. Add the remaining flour mixture and mix together.
  3. Spoon the batter into the paper cases and bake in the oven for 20 mins until risen and golden. Leave to cool for 2 mins before transferring to a cooling rack.
  • 115g butter
  • 200g dark brown soft sugar
  • 90ml double cream
  • pinch of salt
  • 2tbsp salted caramel vodka
  • 190g icing sugar
  1. For the buttercream icing, prepare a caramel sauce by melting the butter in a small pan. Add the brown sugar, cream and salt and cook for around 4 mins, stirring constantly until the sugar has dissolved. Remove from the heat and stir in the vodka bfore leaving to cool for 30mins.
  2. Pour 125ml of the caramel sauce into a small bowl and pour the rest into a mixing bowl. Add the icing sugar to the mixing bowl and beat until fully incorporated. Fill a piping bag, fitted with a star shaped nozzle, with the buttercream icing and pipe onto the cupcakes. Drizzle the cupcakes with the reserved caramel sauce.

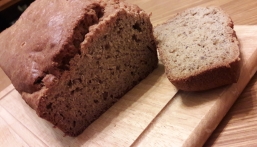
Chocolate Orange Brownies

  • 110g butter
  • 50g plain chocolate, broken into pieces
  • 2 eggs, lightly beaten
  • 225g caster sugar
  • 50g plain flour, sifted
  • 1tsb baking powder
  • 100g Terry’s Chocolate Orange, broken into pieces
  1. Heat oven to 180C fan and line a 20cm square tin with greaseproof paper, leaving some overhang.
  2. Melt the butter and plain chocolate in a bowl over a pan of simmering water and, once melted, leave to cool for five minutes. Add the remaining ingredients and beat well before spreading the mixture into the tin and leveling.
  3. Bake for 30 mins until the top has crusted over but the inside still moist. Leave to cool in the tin before cutting into 16 pieces and placing on a wire rack to cool completely.

World Cup Weekend 2

Last weekend probably involved a world cup country recipe that I was most interested in trying. Saturday saw me make something for South Korea which has brought a new meaning to KFC, Korean Fried Chicken. For my version I served it with a sticky soy based sauce and a kimchi style slaw. This was the first time I’ve attempted deep frying anything as, if I’m perfectly honest, cooking with so much oil horrifies me. But, I have to say, it was definitely worth it.

20180623_184437

Recipe for two people

Chicken

2 Boneless Chicken Thighs

Small amount grated ginger

50g cornflour

Vegetable oil for frying

Sauce

3 tbsp dark brown sugar

1 tbsp chilli paste

1 tbsp soy sauce

1 garlic clove, crushed

Small amount of ginger, grated

Kimchi Style Slaw

1/2 white cabbage, thinly sliced

1 mooli, threaded into thin strips

4 spring onions, thinly sliced

Small amount of ginger, grated

1 tsp golden caster sugar

1 garlic clove, crushed

2 tbsp mayonnaise

Pinch of chilli powder

2 burger buns to serve

  1. Make slaw by mixing all the ingredients together. Chill in the fridge. 
  2. To make the sauce, put all the ingredients in a small saucepan and simmer until it looks syrupy. Take off the heat and put to the side.20180623_184423
  3. Cut away any excess from the chicken and season with slat, pepper and the grated ginger. Coat the chicken with the cornflour until completely covered.
  4. Heat about 2 cm of vegetable oil in a large frying pan. Fry the chicken for 4-5 minutes on each side until crisp. Remove from the pan and place onto kitchen paper, leaving to cool slightly for 2 minutes. Re-fry the chicken in the hot oil for 2-3 minutes until it is extra crispy and golden. Remove to kitchen paper to drain.
  5. Reheat the sauce. Assemble your burgers by placing some kimchi slaw on the bottom of the bun, top with the crispy chicken and sticky sauce drizzled on top. Serve extra slaw on the side and some chips.

Sunday made for a difficult day to think of a recipe as we were limited to just making breakfast at home. With England playing and Mr W offering to make breakfast, a cooked breakfast seemed like the perfect choice. Although it may seem a bit of a cheat, we don’t actually have cooked breakfasts at the weekend. The closest we get is eggs and toast (bacon butties rarely make an appearance). Mr W got into the spirit of things and made a menu of what was on offer and boxes to tick so that he could cook to order (memories of a B&B we’ve stayed in where Mr C in a drunken state requested everything of the menu which included smoked kippers and three different types of egg). Top marks to the chef for this one.

20180624_102000


World Cup Weekend 1

I’m not a football fan and having to put up with World Cup matches on practically all the tie (especially on my birthday) doesn’t exactly make me happy. So, to make the next four weeks more bearable, I’m setting myself World Cup recipe challenges. Twice a week I’m making a recipe for one of the countries laying that day.

First up was something for Saturday and a baking recipe. Biscuits seemed to be the safest bet with a couple of South American countries playing and Australia. I settled on Alfajores, a sweet crumbly biscuit from Argentina. I managed to find a relatively simple recipe here. Although it may not be a traditional recipe, not coated in coconut (a no no for Mr W) or be filled with the delicious dulce de leche, it was still a good substitute. One criticism is that the filling was too soft and with the slightly warmer temperatures, could not survive out of the fridge for longer than 10 minutes.

20180616_172248

The final recipe for week one was in honour of Germany. I managed to find a recipe for German Meatballs with Spaetzle. The meatballs, serves four, were made using 500g beef mince, handful of breadcrumbs, an egg and seasoned with dried oregano and seasoning. Mix together and shape into meatballs before browning in a pan. I then made a mushroom and sour cream sauce to go with it. In the same pan as the meatballs, brown some onions before dding a handful of sliced mushrooms and 500ml beef stock. Simmer for 30 minutes. Mix 150ml soured cream with 1 tablespoon flour and add to the sauce. Stir through and simmer until thickened. Finish with some chopped fresh parsley.

Meanwhile, make the spaetzle (simple egg noodles). To serve two, combine 1 cup of plain flour with 1/2 teaspoon of salt. Add one beaten egg and 1/2 cup of milk and beat well before resting for at least 10 minutes. Place a colander or a steaming pan over a pan of boiling salted water. Press the batter through the colander/steamer using a spatula and cook for 5 minutes. Drain and serve with the meatballs.

20180617_190303

This meal reminded me of when we went to Munich for Oktoberfest. Better suited for winter when you want home comforts as opposed to summer but never mind.

Looking forward to this weekends challenge 🙂

Strawberry Mimosa Cupcakes

20180601_073915

A hen party seemed a great opportunity to try making some cocktail themed cupcakes. I slightly adapted a recipe from one of my (many) baking books.

Firstly, the recipe to make 12 cupcakes will use a small bottle of prosecco (or give you an excuse to finish off a standard bottle).

Secondly, I forgo the handmade decorations that were part of the recipe and the typical hen party themed toppers for some unicorn inspired ones that I found in the supermarket. They were so cute that I couldn’t resist 🙂

20180601_073944

The inclusion of orange zest to the cake and frosting gives it a lovely freshness and balances the sweetness.

Makes 12

190g plain flour

1 1/2 tsp baking powder

1/4 tsp salt

115g unsalted butter, softened

200g caster sugar

1 tsp vanilla bean paste

2 eggs

125ml prosecco

zest of one orange

2tbsp orange juice

Filling

4 tbsp water

2 tbsp cornflour

175g fresh strawberries, chopped into small pieces

75g icing sugar

4 tbsp prosecco

Frosting

115g unsalted butter, softened

440g icing sugar

4 tbsp prosecco

zest of 1 orange

2 tbsp orange juice

Cupcake toppers

  1. Pre-heat oven to 180C and line a 12 hole cupcake tin with paper cases.
  2. 2. Sift together the flour, baking powder and salt in a bowl. In a separate bowl, cream together the butter and sugar using an electric whisk until light and fluffy. Add the vanilla bean paste, then add the eggs one at a time, beating well between each addition. Add half of the flour mixture along with the prosecco and beat until combined. Add the remaining flour mixture, orange zest and orange juice and mix until combined.
  3. Using an ice cream scoop, divide the mixture between the paper cases. Bake in the oven for 20 minutes until risen and golden. Leave to cool in the tin for 2 minutes before transferring to a cooling rack to cool completely.
  4. To make the filling, stir the water and cornflour together in a pan and bring to the boil (mind turned jelly like but don’t worry, mine still came out okay).Add the strawberries and icing sugar, reduce the heat to low and simmer for 5 minutes, stirring frequently, until the mixture is combined. Add the prosecco and simmer for a further 5 minutes until the mixture has thickened. Set aside to cool.
  5. To make the frosting, put the butter, icing sugar, prosecco, orange zest and orange juice into a bowl and meat with an electric mixed until well combined and is at a piping consistency. Spoon into a piping bag fitted with a star nozzle.
  6. Use a cupcake corer/apple corer or small knife to remove the centre of each cupcake. Spoon the strawberry filling into the holes. Pipe the frosting onto the cupcakes and top each cupcake with a topper.

Eat the leftover pieces of cake with leftover jam filling and icing (just to make sure they taste good 😀 )

20180601_212704

Sourdough Banana Bread

I’ve been able to keep a sourdough starter going for a couple of months now. I’ve made three attempts at a sourdough bread and have even bought myself a proving basket (although my only attempt at using it resulted in the dough sticking to it. Lesson learnt – use more flour). For those that have a starter, you will know about the needing to feed it (keeping some aside that you feed and binning the rest). Rather than throw away this discarded starter, I’ve been keeping it in a sealed container in the fridge. Everytime I add to it, I give it a stir. So…what to do with this excess starter? It’s great to use in other baking recipes and on this occasion I made banana bread. I don’t like my banana bread too sweet as I eat it warmed through for breakfast (with pears cooked in marmalade and a dollop of yogurt) rather than a slice for elevenses or an afternoon pick me up. Feel free to add some chocolate chips or chopped nuts (pecans or walnuts would be the perfect combo). I used a food processor which makes it so quick and easy to make.

20180307_055759.jpg          20180307_055957.jpg


Ingredients

1 1/2 cups plain flour

1/2 cup coconut sugar

1 tsp baking powder

1/2 tsp salt

1 cup sourdough starter

1/2 cup butter, softened and cubed

2 medium ripe bananas, mashed

1 egg

1 tsp vanilla bean paste

Method

  1. Pre-heat oven to 160C fan. Grease and line a 2lb loaf tin.
  2. In a food processor, pulse together the flour, sugar, baking soda and salt until its all combined.
  3. Add the sourdough starter, cubed butter and mashed butter on top of the dry ingredients. Then add the egg and vanilla paste. Pulse together until a smooth, thick batter is formed. Scrape the batter into the prepared loaf tin.
  4. Bake in oven for 60 to 70 minutes until well browned and a skewer inserted into the centre comes out clean.

Serving suggestions – liberally covered with nut butter, warmed fruit and yogurt, ice cream, chocolate spread.

20180307_105546.jpg

Biscuit Week

Now…which of the three GBBO biscuit challenges did I attempt this weekend? Was it the playable biscuit board game, sandwich biscuits or the technically challenging fortune cookies? As much as I wanted to make an edible snakes and ladders, it was the slightly easier sandwich biscuits that took my fancy.

A number of biscuits came to mind like empire biscuits and custard creams but I’also made these before. I wanted to try a new bake and had a look through my biscuit cookbook by the GBBO iced biscuit queen, Miranda Gore Brown. One recipe that took my fancy was for bourbon biscuits. A biscuit tin favourite and something I remember from when I was younger and I used to raid my Grandma’s biscuit tin. But Mr W doesn’t like them (shocking considering how much he loves chocolate) and my mum won’t eat them so will need to be saved for a bake for work weekend.

Then I came across a recipe for lemon and poppy seed polenta biscuits. I’ve never seen the lemon and poppy seed combo as a biscuit before and have always wanted to try making lemon and poppy seed muffins (as they sound yummy). I also liked the idea of the cream cheese filling to sandwich them together instead of the typical buttercream filling you find with most sandwich biscuits.

20170909_150913_resized

I spread the making of these over two days. Friday night I made the actual biscuits which was simpler than most as the ingredients can go straight in the food processor. When dividing the biscuits, make sure you make an even number that are roughly the same size as they will be sandwiched together. Be warned, you do need to make some room in the fridge as the biscuits need to be chilled for at least 30 minutes whilst on the baking trays. So, unless you have a super large fridge, maybe wait until the day before you do your food shop 🙂 Once baked, I left them to cool overnight so that I could be certain they wouldn’t melt the filling. On the Saturday morning I whipped up the cream cheese filling and sandwiched the biscuits together. Before starting this, make sure you pair up your biscuits so that you are sandwiching similar sized biscuits together. Nothing worse than being left with two biscuit sized extremes. Once made I’ve kept in the fridge as I don’t want the cream cheese filling to go off. I then let it come to room temperature before eating.

So….polenta in a biscuit. First time I’ve had one to be honest. I found that the texture and taste reminded me slightly of cornbread but with the zesty lemon coming through. They are quite substantial biscuit so you won’t be eating more than one at a time. In total I managed to make 10 sandwiched biscuits. If I was to make them again, I would consider making them smaller so that they are a bit easier to eat. The use of polenta and rice or spelt flour make these a gluten free bake.

Lemon and Poppy Seed Polenta Biscuits

Ingredients

  • 175g caster sugar
  • 20g quick-cook polenta
  • 100g rice or spelt flour (I used Spelt)
  • 170g unsalted butter, softened and cut into pieces
  • zest of two lemons
  • 2 eggs
  • 1/2 tsp vanilla extract
  • 20g poppy seeds

For the filling

  • 200g full fat cream cheese
  • zest of one lemon
  • 1tbsp icing sugar
  • 2tbsp caster sugar
  • 2tbsp lemon juice

Method

  1. Put sugar, polenta and flour into a food processor and whizz well. Add the butter and lemon zest and whizz until it resembles small breadcrumbs. Sprinkle the poppy seeds over the mixture. Beat the eggs and vanilla extract together. Add the eggs to the food processor and mix to get a wet, sticky dough.
  2. Line some baking trays with non-stick baking paper. Using a small ice cream scoop or two tablespoons, place walnut sized balls of dough on the tray and keep them at least 5cm apart. Chill for at least 30 minutes.
  3. Preheat the oven to 180C and bake the chilled biscuits for 10-12 minutes (until golden and firm to the touch). Leave to firm on the tray for at least 10 minutes before transferring to a cooling rack to cool completely.
  4. Put all the filling ingredients into a bowl and beat together until light and creamy. Add a little more lemon juice if the mixture us to dry. When the biscuits are completely cold, spread a layer of filling onto the base of one biscuit and gently press a similar sized biscuit on top.
Recipe taken from Biscuits by Miranda Gore Browne

Sourdough Crumpets

A few months ago I started my own rye sourdough starter. It’s not as difficult as you think. It’s just a combination of flour (dark rye for me) and water that you mix together. This mixture is then ‘fed’ on a daily basis with more flour and water until bubbles start to form. Some starter recipes suggest adding yeast but the whole point of sourdough is that yeast isn’t included, instead the fermentation from the bacteria helps the bread rise and gives the bread its distinctive sour taste. Whilst I’m feeding mine (in preparation for using it) I leave it on the side in a container with a tea towel over the top. When I’m not going to be using it regularly I put a lid on the container and place it in the fridge. This slows down the fermentation and reduces the activity of the bacteria. When I know I want to use it, I remove from the fridge, take off the lid, cover with a tea towel and allow to come to room temperature. I then repeat the feeding process until it starts to bubble/look frothy. Since running out of rye flour I have been using strong white flour. This hasn’t affected the starter and it still has a slight rye flavour to it.

I’ve been using King Arthur Flour and Hobbs House Bakery for guidance on how to make a starter and also for recipe ideas. I’m not an expert on sourdough so if you are wanting to start your own starter, please look at these websites.

My first bake using my starter was a rye sourdough loaf. I would give the bake a 5 out of 10. The flavour was there but the texture was a bit dense. Sourdough takes longer to kneed and I made it all by hand. The recipe said to kneed the dough for 10 minutes until smooth. I was kneading it for 30 minutes and felt I wasn’t going anywhere. I eventually stopped and continued with the recipe but it was wetter than I was expecting. Next time I will use a dough hook and see if that helps. Sourdough has longer proving times (up to 5 hours for first proving and 12 hours for second proving) which improves the distinctive flavour. I’ve also attempted making sourdough pancakes where the sourdough starter is incorporated into the pancake recipe. Again, these had the distinctive sourdough flavour and the earthiness of the rye flour. The texture was also similar to that of my usual pancakes. If you want to give these a go, the recipe I used is here. I included the addition of some chopped chocolate truffles. I added these to the top of the pancakes before I flipped them over in the pan. I served with blueberries and almond slivers as a birthday breakfast for Mr W.

Yesterday morning I decided to give sourdough crumpets a try. I was surprised at how few ingredients you actually need to make them. Although crumpet rings are not a necessary piece of equipment (apparently small food cans with both ends taken off work just as well) they do make life easier. I’ve also used them when making pancakes and poaching eggs (multipurpose utensil). I found the recipe on the Hobbs Bakery website (link above) when trying to find different uses for my starter so that it is not sat in the fridge for months on end.

Sourdough Crumpets (makes 4)

Ingredients

  • 270g sourdough starter
  • 1/2 tsp salt
  • 1 tbsp runny honey
  • 1/2 tsp bicarbonate soda

Method

  1. Mix your sourdough starter, salt and honey together in a bowl and leave to stand. The starter will slowly start to bubble (I left mine for 20 minutes and some small bubbles had appeared).
  2. Grease a frying pan and your crumpet rings. Place the frying pan on a medium heat and put the crumpet rings in the pan.
  3. Add the bicorbanate soda to your sourdough starter mix. This will cause the starter to bubble.
  4. Once the frying and crumpet rings are hot, pour the batter into the rings and leave a 1/2 cm gap at the top. Slowly cook the crumpets and keep an eye on the bottom of the crumpet as this can easily burn.
  5. Once the edges have cooked, gently take off the crumpet ring (may need to loosen edges with a knife) and flip the crumpet over. Cook for a further 3 to 4 minutes.
  6. Keep these warm whilst you repeat steps 4 and 5 with the remaining batter.

20170909_151211_resized

I made four crumpets with the above recipe. These were delicious for breakfast (one with jam and one with butter).

I did find the crumpets a little too salty (which you also get with the shop bought kind) so would consider using  a little less.

I found the texture on my first two crumpets to be a bit doughy inside. For the next two I used  a lower heat and cooked for a little longer. I have yet to try these (4 for breakfast is a little excessive and Mr W doesn’t like them).

It’s back….GBBO!

So, the Great British Bake Off is back and some mixed reviews to go with it. For those who aren’t aware (where have you been?), GBBO has moved from BBC1 to channel 4. It’s taken everything with it except Mary, Mel and Sue. It’s the same tent in the same location with the same benches and even the same opening credits. There is now the addition of Sandie, Noel, Prue and some advert breaks (which is actually a welcome relief). Some reviews have been that it is obvious that the dialogue between Sandie and Noel is scripted and doesn’t seem as natural as Sue and Mel. What we need to remember is that the show is currently on it’s eighth series which means that there has been 7 years for the show to become what it was and for the dynamics to work (with Mary, Paul, Mel and Sue). I’m sure if we were to watch the first series again, we will have some comments to make about the presenters. Personally, I’m just glad it’s back on 🙂

So the first episode was cake week with the first bake needing to be a fruity cake. Now, this seemed to fit in well with my need to make a cake, in particular an apple cake….an Italian apple cake. Now I’ve made an Italian apple cake before but the flavours did not quite meet the bar set by the version Mr W had whilst we were on honeymoon. So I did a bit of research in preparation for my weekend bake and managed to find a recipe on pinterest which looked like the apple cake I wanted. It was simple and uncomplicated (just what I needed to ease me back into baking). The inspiration for mine came from Manus Manu , a website full of Italian recipes. This particular cake was light and moist with hints of vanilla, sweetness from the apple and a zing from the lemon zest. Would go perfect with a scoop of vanilla ice cream (or gelato if we’re being fancy). It definitely benefits from a dusting of icing sugar on top. I didn’t have any for the first time we ate it but bought some so we could have a dusting on our second slice (never assume you have an ingredient in).

20170903_192303_resized

Torta Di Mele Della Nonna (Granny’s Apple Cake) (Serves 12)

Ingredients
  • 3 apples, peeled and sliced
  • 2 eggs
  • 200g plain flour
  • 100g butter, melted
  • 180g caster sugar
  • 150 ml milk
  • 1 lemon zest
  • 1 pinch of salt
  • 2 ½ tsp baking powder
  • 1 tsp vanilla extract
  • Icing sugar (for dusting)

Method

  1. Grease and coat with flour a 22 cm – 9 inch springform pan and keep it aside.
  2. Beat the eggs and sugar until pale and fluffy.
  3. Add the melted butter and keep beating.
  4. Add the milk and flour, little by little and keep beating.
  5. Add the baking powder, salt, lemon zest and vanilla extract.
  6. Fold in the apple slices and pour into the prepared springform pan.
  7. Bake in a pre-heated oven at 180°C  for 45 minutes.
  8. Let the cake cool down, then release from the tin, dust it with icing sugar and serve it.

As we don’t have 12 people in our house and didn’t particularly want to eat the cake for 6 days straight (as delicious as it is), I have put some slices in the freezer to test how well it freezes (fingers crossed).

20170907_191149_resized

Portable Breakfasts

This month, Mr W and I spent a few days in Cambridge to celebrate our two year wedding anniversary (the time has flew by). Usually, we would book into a B&B but this time we were room only which meant finding somewhere to eat. Mr W did a little research and found some good reviews for a little cafe tucked away in the centre. Although the breakfast menu was a little limited (only about four options and the closest to a cooked breakfast was toast) Mr W was happy to try it. Boy we were glad. We enjoyed it that much that we went for breakfast again the next day. As Mr W put it, you don’t want to finish a holiday going somewhere new for breakfast and potentially be disappointed when we can go back to somewhere we really enjoyed.

20170509_093148

Mr W decided on the fruit compote, natural yogurt and granola whilst I tried the apple bircher muesli. Although I have made my own takes on bircher at home, I’ve never bought one and was intrigued as to what the consistency was going to be like. I’ve followed recipes where these has been way too much liquid (think an island of oats surrounded by a sea of milk) or quite dry. For me, this one had the moist texture I like when I make it. It was a combination of oats, grated apple, raisins, cinnamon and topped with some fresh fruit. Mr W’s was strawberry compote layered with banana, natural yogurt and topped with a soft, flapjack like granola. I think it was the flapjack granola that sealed the deal for Mr W. For those ever in Cambridge, head to Stickybeaks Cafe (for this breakfast), the Pint Shop (try the homemade scotch egg), the Free Press (quirky little pub), Jack’s Gelato (always room for ice cream) and Meat and Bread (amazing sandwiches and tasty sounding brownies).

When we got home, I made my version of the yogurt and fruit jam jar breakfast. First up I mashed some fresh strawberries with some honey, chia seeds and cinnamon. This was to get a soft compote like texture which still had some structure to it to prevent it seeping into the yogurt. So, I put a layer of the strawberry compote in the bottom of two jam jars , topped this with a layer of sliced banana and then a layer of natural yogurt. I then repeated the layering so that there were two layers of each. I then topped with some Graze strawberry yogurt protein topper. This has a mix of small toasted oats, freeze dried strawberries and crispy yogurt balls. I did the layering the night before and stored in the fridge overnight. In the morning I then added the protein topper so that it still retained it’s crunch. You could always top it with shop bought or homemade granola or use a different fruit for the compote. I can imagine stewed apples would be nice for autumn. My version got the thumbs up from Mr W.

1495899241944

The serving of the bircher and yogurt pots in jam jars got me thinking that I could make similar things for breakfast to take to work. Recently I seem to be rushing in the morning and don’t get t enjoy my breakfast. My thoughts were that I could prepare the breakfast the night before and divide into two jam jars and that would be two day’s of breakfasts sorted. So, over the last two weeks I have had a portable jam jar breakfast for eight mornings and have tried three different recipes. My favourite (the one I repeated) was one that I found in a Madeline Shaw cookbook that I adapted slightly. When I initially saw it, it reminded me of the one I had in Cambridge. In the recipe, the amount of oats stated is a little too much for me. I also made some slight changes the second time by not adding any honey or maple syrup as I found it sweet enough and adding some raisins to the bottom of each jar. So, the night before I mixed 100g oats with a grated apple, 250ml almond milk, 1/2 tsp cinnamon and some vanilla (I use a vanilla grinder as it gives the flecks of vanilla that I love). Get two jam jars or containers and add a spoonful of raisins to the bottom of each and divide the oat mixture between the two jars and keep in the fridge. The following morning I topped the bircher with some natural yogurt, blueberries and some Graze vanilla sunflower seeds (beware, these are addictive). Although it didn’t look as pretty by the time I transported in to work, it still tasted yummy. I kept the other jar in the fridge for 2 days before eating and it was still fine.

I also made a carrot bircher (another Madeline Shaw recipe) and a layered chia pudding. For me, these recipes still need a bit of tweaking, Although the carrot bircher was okay, the texture seemed a bit sloppy and it needs the addition of some raisins or nuts to give it a carrot cake vibe. The chia pudding wasn’t firm enough and by the time I got to work, the yogurt had mixed together with it. By slicing the strawberries, I seemed to make it more difficult to eat. A compote idea might work better. I have managed to find some other chia pudding recipes which I’m going to try this week. Chocolate and peanut butter…. As we are approaching summer, these jam jar breakfasts are a great replacements for hot porridge. Here’s to more flavour combinations!

Rocky Road

Last Friday saw the UK raising money for Red Nose Day. At my work, we have one charity that we raise money for each year so nothing was organised to raise money for Red Nose Day. My dad, however, was involved in a number of events to raise money for this cause. First, he works in a call centre which was being used to take calls from members of the public wanting to make donations. Secondly, he was getting his head shaved to raise money. When he was younger, my dad used to have long hair and as he has gotten older he’s kept it short but has never dared to get rid of it completely. Why would he? He hasn’t started to lose any yet and it is still it’s natural colour (no grey appearing yet). Good on him for going through with it but now he’s worried it won’t grow back. Thirdly, charity bake sale. Cue him asking me (very nicely) if I’d do some baking for him. He re-requested some triple chocolate cookies that I baked for his team last month, which I did bake for him. But the week before, I found out that maltesers were promising to donate ÂŁ5 for every photo that was posted on the Facebook page showing a Red Nose Day charity bake using maltesers. Now, that wasn’t a challenge I was going to ignore. So, it got me thinking about what I could make. Crush some maltesers and mix them into the cookie mix instead of chocolate chips? Nope, his team were looking forward to the original cookie recipe. Make some malteser cupcakes? Nope, last time I was involved in a cake sale, the cupcakes were still there until the end. Make a malteser cake? Nope, my dad would only worry about cutting it into pieces.

Rocky road….chocolate….biscuits….marshmallows….maltesers…winner!!!

20170323_173315

A bonus about rocky road is that it is simple to make and can be made in advance. No manic baking the day before trying to get everything ready for me to to take round to my dad. So, as mentioned above, my recipe only consists of four ingredients, yes, FOUR!! Everyone has an opinion on what should be in rocky road. Dried fruit, cherries, nuts, marshmallows, certain type of biscuit, certain type of chocolate, dusted with icing sugar….The list is endless. For me, I like to keep it simple. Adding too much can mean fewer people will buy it. With this recipe you can interchange the type of biscuit used (shortbread, shortcake, cookies, rich tea, digestives, oreo) or put in your favourite chocolate bar (crunchie, double decker, mars bar, milky way). But if you want to re-create my version, follow the below recipe.

  • 450g milk chocolate, broken into pieces
  • 150g ginger biscuits, broken into 1cm chunks
  • 100g mini marshmallows
  • 80g maltesers

Line the base and sides of a 7×9 inch cake tin with baking parchment. Place the milk chocolate in a heatproof bowl set over a saucepan of hot water. Bring the water to the boil, then take the pan off the heat and allow the chocolate to melt slowly. Once the chocolate has melted, remove the bowl from the pan and leave to cool slightly. If the chocolate is too hot the marshmallows will melt. Stir in the biscuits, mini marshmallows and maltesers and then press into the cake tin. Place in the fridge to chill for 1-2 hours or until set. Cut into 12 pieces.

I use basic own brand chocolate as I feel it is not as sickly as the brand and balances well with the sweetness of the rest of the ingredients.

I’ve made this before where I have used one third plain chocolate and two thirds milk chocolate which gives it a bit of bitterness.

I melted 50g white chocolate and drizzled over the top once it had set to add some contrast.

Mr W managed to sneak a piece before it went and loved it. I was worried the ginger biscuits might overpower but he felt they worked well. Feedback from my dad’s work has been good and some have wanted the recipe. Here you go 🙂